10 Office Chair Yoga Poses: In the hustle and bustle of the modern workplace, finding moments of tranquility is essential for maintaining overall well-being. One effective way to introduce calm into your work routine is through the practice of office yoga. This article explores the benefits of office yoga and provides a detailed guide on ten office yoga poses that can be seamlessly integrated into your daily work life.
Benefits of Office Yoga
Before delving into the specific poses, let’s take a moment to understand why office yoga is gaining tremendous popularity in today’s fast-paced work environments. The allure lies in its ability to seamlessly integrate into your daily routine, offering a plethora of benefits beyond the physical realm.
Incorporating yoga into your work routine has been proven to be a game-changer, positively impacting various facets of your professional life. It’s not merely a series of physical exercises; rather, it presents a holistic approach to well-being, touching upon the physical, mental, and emotional aspects of your health.
Numerous studies have highlighted the transformative power of incorporating yoga practices into the workplace. One of the key advantages is its remarkable influence on productivity. By engaging in mindful movements and breathing exercises, employees report heightened levels of focus and a substantial boost in overall productivity.
Furthermore, the stress-reducing benefits of office yoga cannot be overstated. In today’s hectic work culture, stress has become an inevitable companion, affecting both mental and physical health. Incorporating yoga into the workday is an effective antidote to stress, providing a sanctuary of calm amidst the chaos.
The practice also extends its benefits to enhancing focus and concentration. Amid deadlines and constant multitasking, maintaining a sharp focus is crucial. Office yoga offers a reprieve, allowing individuals to recalibrate their mental faculties, resulting in improved concentration and decision-making skills.
As we delve into the specific yoga poses designed for the office environment, it’s essential to recognize that this is not just a fleeting trend but a transformative lifestyle choice. By embracing the holistic approach of office yoga, you’re not only investing in your physical health but also nurturing a balanced and resilient mindset that can withstand the challenges of the modern workplace.
Getting Started: Setting Up Your Office Space
Creating a conducive space for office yoga is not just about finding an empty corner. It’s about curating an environment that invites tranquility and mindfulness into your work routine. Begin by selecting a quiet area within your workspace where you can carve out a few moments for yourself without the interruptions of phone calls or colleagues.
Consider the lighting in your chosen space. Natural light, if available, can be particularly rejuvenating, enhancing the overall experience. If the setting sun graces your workspace, it adds a touch of warmth to your practice. On the other hand, if your office lacks natural light, opt for softer artificial lighting to create a calm and inviting atmosphere.
Now, let’s talk about the foundation of your practice. If feasible, bring in a yoga mat to define your space and provide a comfortable foundation for your movements. However, if a yoga mat is not practical in your office setting, a comfortable chair can serve as an excellent alternative. Ensure that your chair is stable and supportive, allowing you to perform the poses with ease.
Choosing the right chair is crucial – one with a supportive back and a comfortable seat can make a significant difference in your practice. If your office chair lacks the necessary comfort, consider bringing in a cushion or using a chair with proper lumbar support. The goal is to create an inviting space that encourages you to embrace the benefits of office yoga effortlessly.
With your space set, the stage is now perfectly arranged for the transformative journey into office yoga. As we delve into the ten poses tailored for the office environment, remember that your space is not just a physical backdrop but an essential component in fostering a mindful and enriching experience. Now, let’s explore these office yoga poses that have the potential to positively shape your workday.
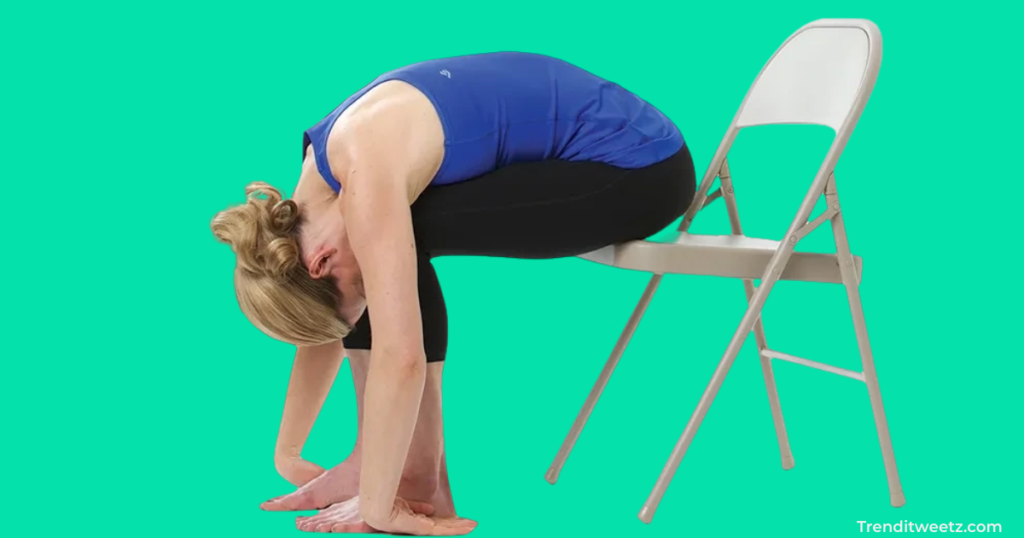
Office Chair Yoga Poses 1: Seated Forward Bend
To begin the Seated Forward Bend, follow these steps:
- Position Yourself: Start by sitting on the edge of your chair with your feet firmly planted on the ground. Ensure that your knees are aligned with your ankles, forming a comfortable and stable foundation.
- Find a Comfortable Posture: Sit up straight, allowing your spine to be in a neutral position. Rest your hands on your thighs or knees with your palms facing downward. This initial posture sets the stage for the upcoming movement.
- Inhale and Lengthen: Take a slow, deep breath in through your nose. As you inhale, focus on lengthening your spine upward. Imagine each vertebrae extending, creating space between them. This action helps to engage your core and prepares your body for the forward fold.
- Exhale and Hinge at Your Hips: With your spine elongated, exhale slowly through your mouth. As you exhale, initiate the forward movement by hinging at your hips. Imagine your hips as the pivot point, allowing your upper body to tilt forward while keeping your back straight.
- Reach Forward: As you hinge at your hips, extend your arms forward, reaching toward the ground or your feet. The goal is not to touch your toes but to feel a gentle stretch in your lower back and the back of your thighs. Keep your neck relaxed, and let your head hang naturally.
- Feel the Stretch: Hold the position for a few breaths, allowing the stretch to deepen gradually. Focus on the sensation in your lower back, feeling the release of tension with each breath.
- Promote a Sense of Calm: The Seated Forward Bend is not only a physical stretch but also a mental release. As you hold the pose, concentrate on your breath and allow a sense of calm to envelop you. Feel the soothing effect on your nervous system.
- Return to Upright Position: To exit the pose, inhale deeply and engage your core. Slowly lift your torso, returning to an upright seated position. Take a moment to notice the subtle changes in your body and the newfound ease in your lower back.
This Seated Forward Bend is a versatile and accessible office yoga pose that can be performed discreetly at your desk, providing a quick remedy for lower back discomfort and promoting a moment of tranquility in the midst of a busy workday.
Office Chair Yoga Poses 2: Desk Shoulder Opener
To perform the Desk Shoulder Opener, follow these simple steps:
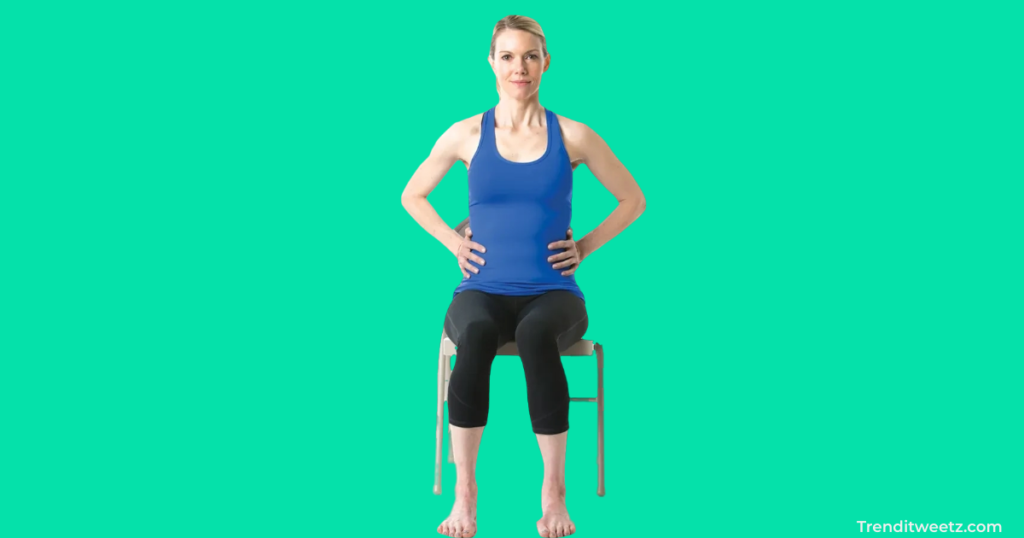
- Sit Comfortably: Start by sitting comfortably in your chair with your feet flat on the ground. Ensure that your back is straight, and your shoulders are relaxed.
- Interlace Your Fingers: While seated, reach your hands behind your back and interlace your fingers. If possible, clasp your hands together, intertwining your fingers. If clasping is challenging, hold onto a small towel or use a yoga strap to bridge the gap between your hands.
- Straighten Your Arms: With your fingers interlaced, straighten your arms. Allow your elbows to gently extend, creating a straight line from your shoulders to your hands. This action helps in opening up the chest and shoulders.
- Lift Your Arms Slightly: Once your arms are straight, lift them slightly away from your back. This lifting motion contributes to the stretch in your shoulders and upper back. Be mindful not to overextend; a slight lift is sufficient.
- Feel the Stretch: As you straighten your arms and lift them, you’ll feel a gentle but effective stretch across your shoulders and the front of your chest. This stretch is particularly beneficial for alleviating tension that accumulates from prolonged periods of typing or desk work.
- Maintain a Relaxed Neck: While in the stretch, keep your neck relaxed. Avoid tensing your neck muscles, and allow your head to stay in a comfortable and natural position.
- Hold the Pose: Hold the Desk Shoulder Opener for 20-30 seconds, breathing deeply and allowing the stretch to gradually release any tightness in your neck and shoulders.
- Release and Relax: After holding the stretch, slowly release your hands and let them come back to your lap. Take a moment to notice the newfound openness and relaxation in your shoulders.
The Desk Shoulder Opener is an excellent stretch to incorporate into your routine, especially if you spend extended hours at your desk. It counteracts the forward-leaning posture and relieves tension in the neck and shoulders, contributing to improved posture and overall well-being. Perform this stretch regularly to enhance flexibility and reduce discomfort associated with desk-related activities.
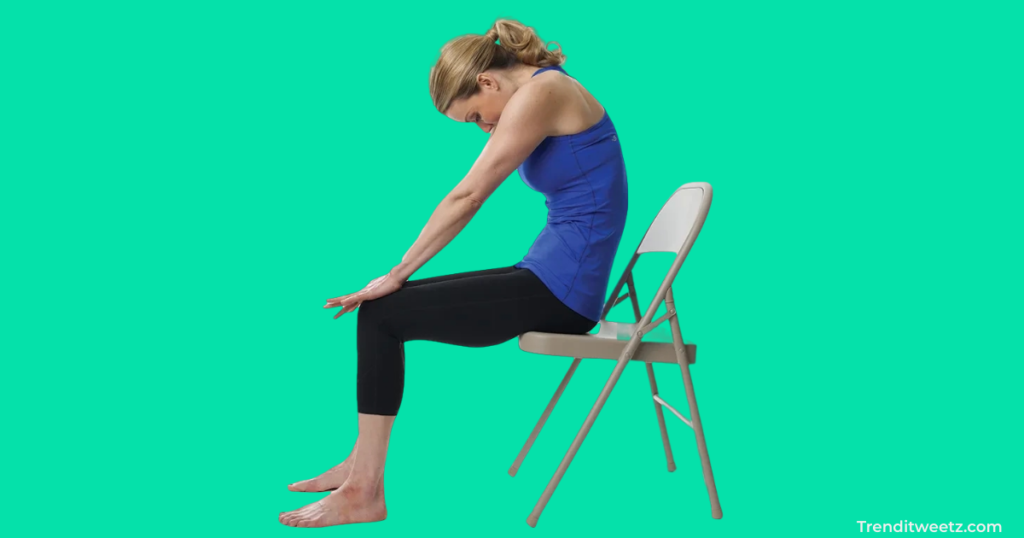
Office Chair Yoga Poses 3: Chair Cat-Cow Stretch
Office Chair Yoga Poses 4: Seated Spinal Twist
To perform the Seated Spinal Twist, follow these steps:
- Sit Tall: Start by sitting comfortably on a chair with your feet flat on the ground. Ensure that your back is straight, and your shoulders are relaxed. Sitting tall helps create a stable foundation for the twist.
- Find a Comfortable Seated Position: Position yourself toward the front edge of your chair, allowing your hips to be slightly higher than your knees. This alignment supports a more effective twist.
- Place One Hand on the Opposite Knee: While maintaining an upright posture, place your right hand on your left knee, or vice versa. This hand placement serves as an anchor to initiate the twist.
- Inhale to Lengthen Your Spine: Take a deep breath in through your nose, and as you do, lengthen your spine. Imagine your crown reaching toward the ceiling, creating space between each vertebra.
- Exhale to Gently Twist: On the exhale, begin to turn your upper body to the left (if your right hand is on your left knee), twisting at the waist. Use your hand on your knee as leverage to deepen the twist.
- Look Over Your Shoulder: Continue the twist until you feel a comfortable stretch. If it feels comfortable for your neck, turn your head to look over your left shoulder, deepening the stretch and maintaining a gentle twist through your entire spine.
- Feel the Stretch: Hold the twist for 20-30 seconds, focusing on the gentle pull along your spine. Feel the stretch in your mid and lower back, promoting increased mobility in these areas.
- Maintain a Gentle Twist: Avoid forcing your body into the twist; instead, let it happen gradually. The goal is to enhance spinal mobility without causing strain or discomfort.
- Switch Sides: After holding the twist on one side, return to the center, and then repeat the process on the opposite side. Place the opposite hand on the opposite knee and twist gently in the other direction.
- Release Mindfully: To conclude the Seated Spinal Twist, return to the center and sit tall. Take a moment to notice the newfound openness and flexibility in your spine.
The Seated Spinal Twist is an excellent yoga pose for incorporating into your office routine. It helps enhance spinal mobility, alleviates lower back discomfort, and provides a quick and accessible way to introduce a stretch into your workday. Regular practice of this twist can contribute to maintaining a healthy and flexible spine.
Office Chair Yoga Poses 5: Wrist Stretch
To perform the Wrist Stretch and alleviate the strain from constant typing, follow these steps:
- Sit Comfortably: Begin by sitting comfortably in your chair with your back straight and your feet flat on the ground. Position yourself so that you have ample space to extend your arms.
- Extend Your Right Arm: Start with your right arm extended in front of you, palm facing down. Ensure your fingers are straight and parallel to the ground.
- Palm Down Position: Rotate your right palm to face downward. This movement creates a stretch along the top of your forearm and into your wrist.
- Gentle Pressure: With your right palm facing down, use your left hand to gently press on the fingers of your right hand. Apply a mild and controlled pressure to enhance the stretch across your wrist and forearm.
- Feel the Stretch: Hold the stretch for about 15-30 seconds, focusing on the sensation along the top of your wrist. You should feel a gentle pull, but it should not be painful. This stretch is particularly effective for combating the strain that arises from repetitive wrist movements.
- Switch to the Other Hand: After holding the stretch on your right hand, release the pressure and bring your right hand back to a neutral position. Now, extend your left arm, palm facing down, and repeat the process. Use your right hand to gently press on the fingers of your left hand.
- Rotate Your Wrist: As an additional step, you can rotate your wrist slightly to the left and right while maintaining the palm-down position. This movement helps to target different areas of the wrist and forearm, promoting flexibility.
- Repeat as Needed: You can repeat the Wrist Stretch on both hands multiple times, especially if you’ve been engaged in prolonged typing or activities that strain your wrists.
- Maintain Gentle Movements: Throughout the stretch, it’s crucial to maintain gentle and controlled movements. Avoid forceful pressing, and listen to your body. If you feel any pain, ease off the pressure.
- Incorporate Regularly: Consider incorporating the Wrist Stretch into your routine, especially during breaks or moments when you feel tension in your wrists. Regular practice can contribute to the prevention of wrist discomfort and promote overall wrist flexibility.
This simple but effective Wrist Stretch provides relief to the often-overlooked area of the wrists, making it an ideal exercise for individuals spending extended hours typing or engaging in activities that strain the wrist joints.
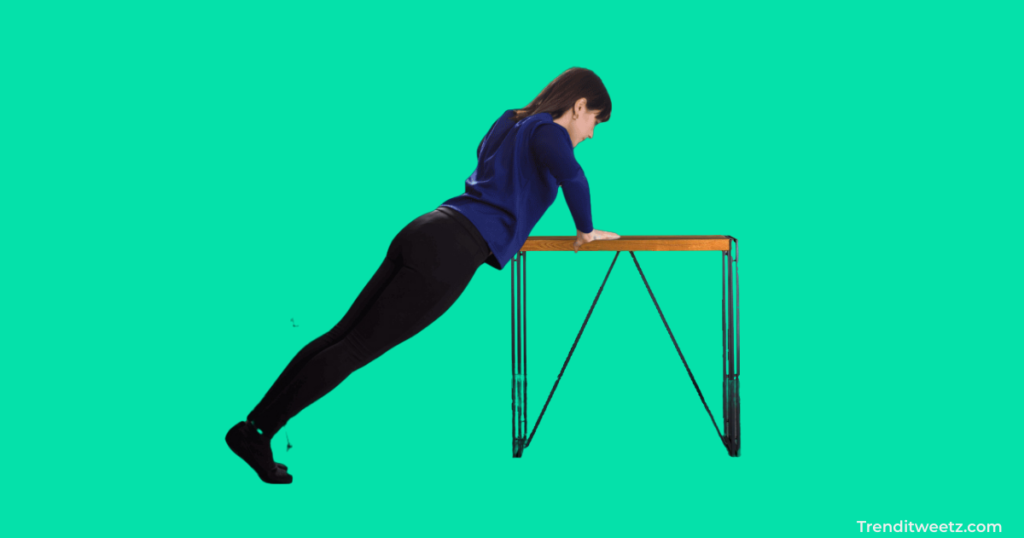
Office Chair Yoga Poses 6: Desk Plank Pose
To perform the Desk Plank Pose and engage your core while at your desk, follow these steps:
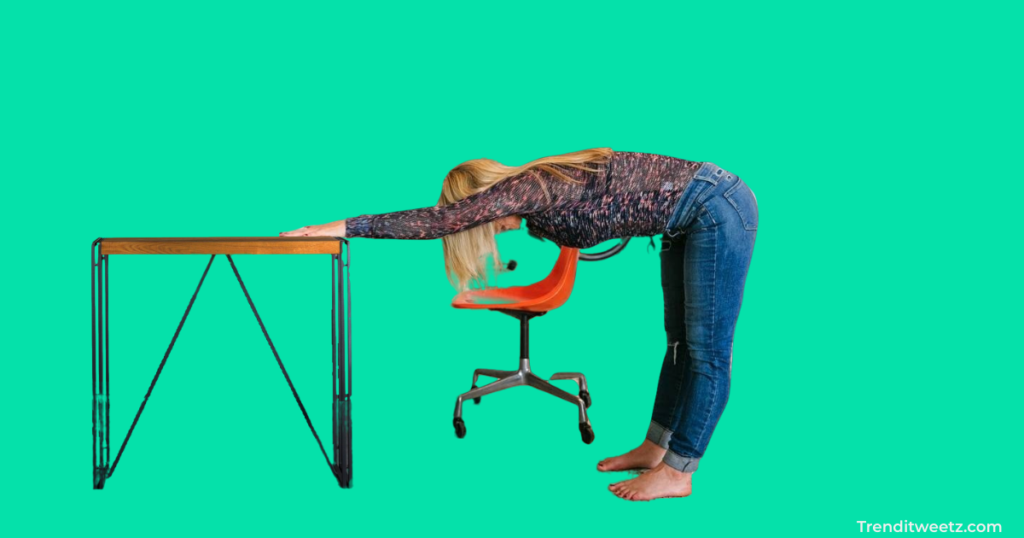
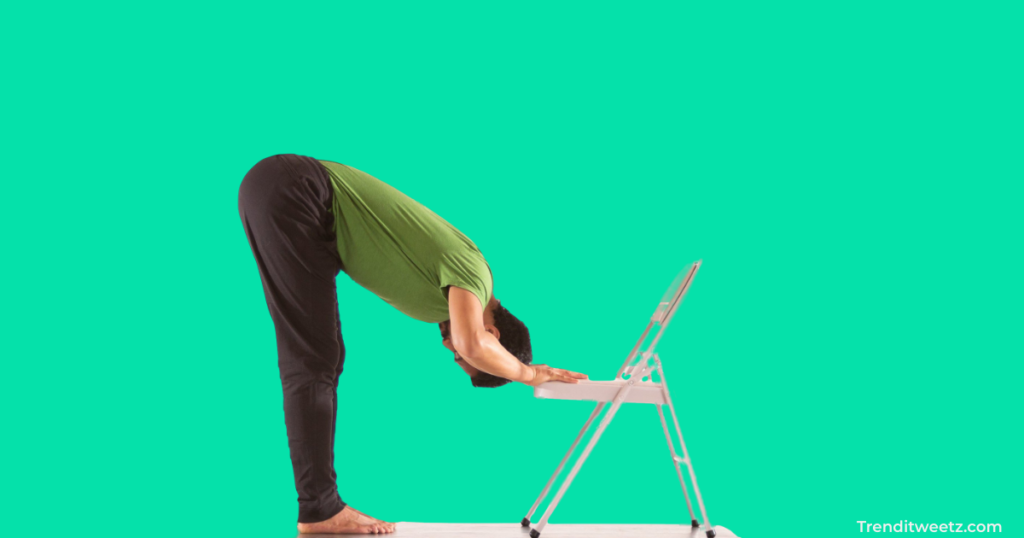
Office Chair Yoga Poses 7: Standing Forward Fold
To perform the Standing Forward Fold and release tension in your hamstrings while promoting relaxation, follow these steps:
- Stand Tall: Begin by standing upright with your feet hip-width apart. Ensure that your weight is evenly distributed on both feet, and your posture is straight.
- Engage Your Core: Engage your core muscles by gently drawing your belly button towards your spine. This helps to stabilize your lower back and supports the movement of the forward fold.
- Hinge at Your Hips: On an exhale, hinge at your hips, allowing your upper body to fold forward. Imagine your hips as the pivot point, and lean forward while keeping your back straight. The movement should come from your hips rather than rounding your back.
- Let Your Arms Hang: Allow your arms to hang freely toward the ground, letting them dangle or gently clasping opposite elbows. Your head and neck should be relaxed, and your gaze can be directed towards your legs or the floor.
- Relax Your Neck: Ensure that your neck is relaxed. Let your head hang naturally, and avoid any tension in your neck or shoulders. This position allows for a gentle stretch along the entire length of your spine.
- Feel the Stretch in Your Hamstrings: As you fold forward, you’ll feel a gentle stretch in the back of your thighs and hamstrings. This stretch helps to release tension accumulated from prolonged periods of sitting or standing.
- Bend Your Knees if Needed: If you feel any discomfort or tightness in your hamstrings, you can slightly bend your knees. This modification is especially helpful if you are new to the pose or if you have tight hamstrings.
- Hold the Pose: Hold the Standing Forward Fold for 20-30 seconds or longer, allowing the stretch to deepen with each breath. Focus on breathing deeply and releasing any tension in your muscles.
- Promote Relaxation: Embrace the relaxation aspect of this pose. As you hang forward, let go of any stress or tension in your body. This simple yet effective stretch can be a quick remedy for refreshing your mind and body during a busy workday.
- Return to Upright Position: To come out of the pose, engage your core, and slowly lift your torso back up to an upright position. Take your time to avoid dizziness, and stand tall with a renewed sense of relaxation.
Incorporating the Standing Forward Fold into your routine at the office provides a convenient way to stretch your hamstrings and release tension in a confined space. It’s a rejuvenating pose that can be easily integrated into short breaks, promoting both physical flexibility and mental well-being.
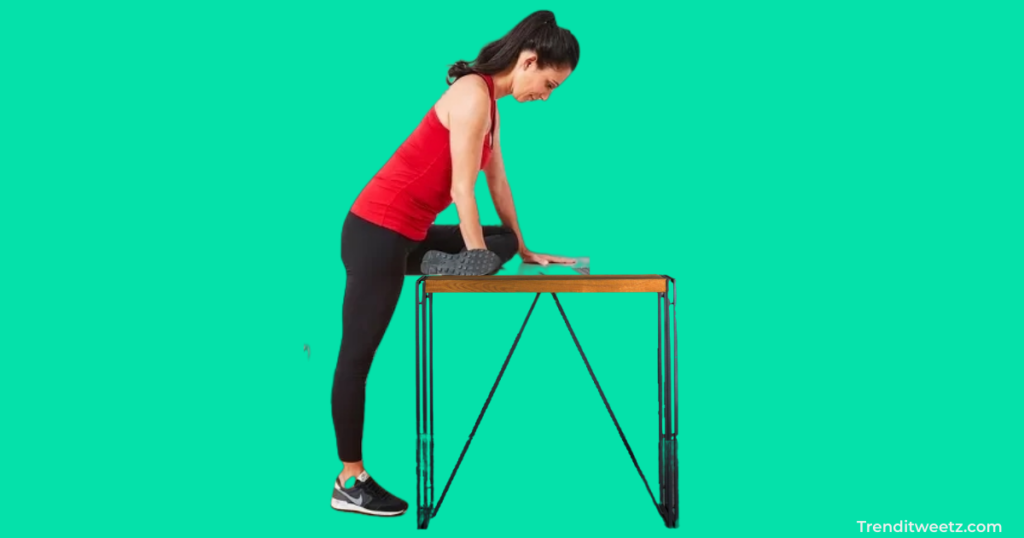
Office Chair Yoga Poses 8: Chair Pigeon Pose
To perform the Chair Pigeon Pose while seated and experience a stretch in your outer hip, follow these steps:
- Sit Comfortably: Begin by sitting comfortably in your chair with your back straight and your feet flat on the ground. Ensure that you have enough space to comfortably cross one ankle over the opposite knee.
- Cross One Ankle: Lift your right foot and cross your right ankle over your left knee. Flex your right foot to engage the muscles and protect your knee joint. This forms the initial position for the Chair Pigeon Pose.
- Maintain Good Posture: Sit up straight with your shoulders relaxed. Ensure that your spine is aligned and your chest is open. This optimal posture sets the foundation for a more effective stretch.
- Flex the Foot: Flex your right foot by drawing your toes towards your knee. This action activates the muscles in your outer hip, preparing them for the upcoming stretch.
- Gently Lean Forward: While keeping your back straight, start to lean forward from your hips. The goal is to feel a gentle stretch in your outer hip on the right side. Adjust the intensity of the stretch by varying the degree of your forward lean.
- Feel the Stretch: As you lean forward, you should feel a noticeable stretch in the outer hip and possibly the gluteal muscles of your right leg. This stretch targets areas that often become tight, especially for individuals who spend extended hours sitting.
- Hold the Pose: Hold the Chair Pigeon Pose for 20-30 seconds, allowing the stretch to gradually deepen. Focus on your breath, inhaling and exhaling steadily to enhance relaxation and release tension.
- Switch to the Other Leg: After holding the stretch on the right side, return to an upright position. Uncross your legs and repeat the Chair Pigeon Pose with your left ankle crossed over your right knee. Flex the left foot and gently lean forward to stretch the outer hip on the left side.
- Maintain Gentle Movements: Throughout the pose, ensure that your movements are gentle and controlled. Avoid forcing your body into the stretch, and listen to your body’s signals. If you feel any pain, ease off the stretch.
- Incorporate Regularly: Consider incorporating the Chair Pigeon Pose into your routine, especially if you experience hip tightness. Regular practice can contribute to increased flexibility in the hips and improved overall comfort.
The Chair Pigeon Pose is an accessible seated stretch that targets the outer hips, making it an excellent option for individuals who may be dealing with hip tightness due to prolonged periods of sitting. It’s a simple yet effective way to release tension and promote hip flexibility.
Office Chair Yoga Poses 9: Eyes Relaxation Exercise
Office Chair Yoga Poses 10: Deep Breathing Exercise
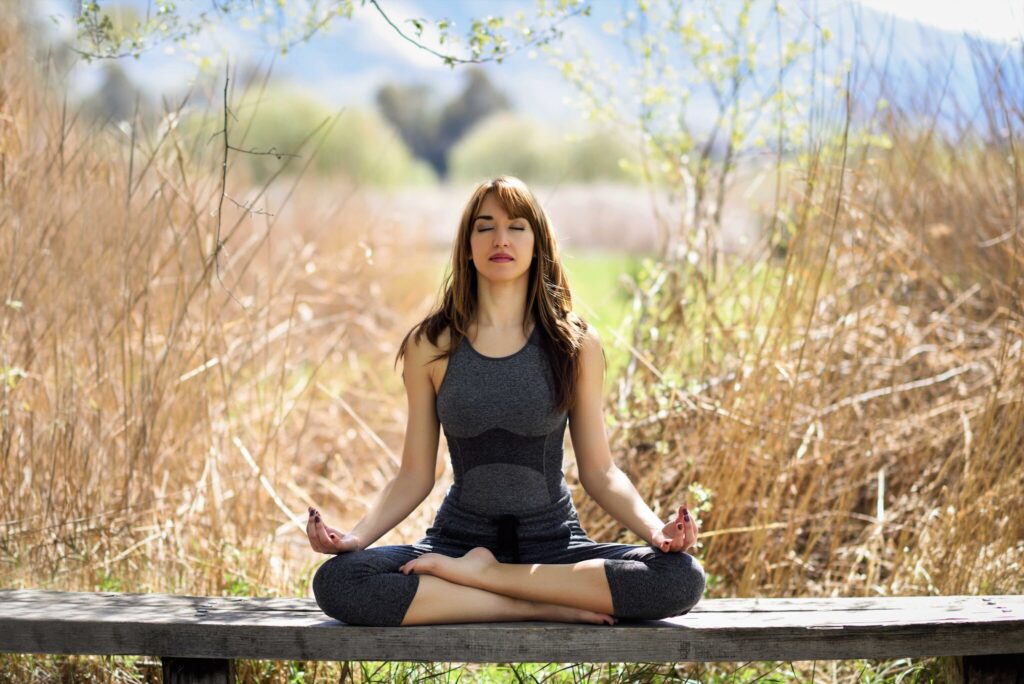
To perform the Deep Breathing Exercise for relaxation and stress reduction, follow these steps:
- Find a Comfortable Seated Position: Begin by sitting comfortably in a chair or on the floor. Ensure that your back is straight, your shoulders are relaxed, and your hands are resting comfortably on your lap.
- Close Your Eyes (Optional): If you feel comfortable, close your eyes to minimize external distractions and enhance your focus on the breath. Alternatively, you can keep your eyes open with a soft gaze.
- Inhale Slowly Through Your Nose: Inhale deeply and slowly through your nose. Focus on filling your lungs with air, allowing your abdomen to expand. Imagine the breath traveling down to your diaphragm, creating a sense of fullness in your lower lungs.
- Expand Your Diaphragm: As you inhale, consciously expand your diaphragm. Feel your chest and ribcage gently rise, and let the breath reach the lower part of your lungs. This diaphragmatic breathing helps maximize oxygen intake and promotes a calm state of mind.
- Hold Your Breath (Optional): At the top of your inhalation, you can briefly hold your breath for a moment if you are comfortable doing so. However, if you prefer continuous breathing, proceed to the next step without holding your breath.
- Exhale Slowly Through Your Mouth: Exhale slowly and completely through your mouth. Allow the breath to leave your body in a controlled manner. Focus on releasing any tension or stress as you exhale.
- Feel the Relaxation: As you continue with the deep breathing, concentrate on the sensation of relaxation. Feel the calming effect of each breath as it helps release tension from your body and mind.
- Repeat the Process: Repeat the cycle of deep breaths. Inhale through your nose, expand your diaphragm, and exhale through your mouth. Allow each breath to be intentional and soothing.
- Set a Comfortable Rhythm: Establish a rhythm that feels comfortable for you. You may choose to inhale for a count of four, hold for two (optional), and exhale for a count of six. Adjust the timing to suit your preference and comfort level.
- Continue for a Few Minutes: Engage in this deep breathing exercise for at least a few minutes. Allow the rhythmic breaths to create a sense of calmness and tranquility within you.
Incorporating the Deep Breathing Exercise into your routine, especially during moments of stress or when you need a quick relaxation technique, can be highly beneficial. This simple yet powerful breathing exercise helps center your mind, reduce stress, and promote a heightened sense of well-being.
Incorporating Office Yoga into Your Routine
Now that you’re familiar with these office yoga poses, consider incorporating them into your daily routine. Schedule short breaks throughout the day to practice these poses, and encourage your colleagues to join in. A collective effort toward well-being can positively impact the workplace environment.
In the fast-paced world of offices and meetings, taking a moment for yourself is crucial. Office yoga provides a practical and accessible solution for incorporating wellness into your workday. By embracing these ten poses, you can enhance your physical and mental well-being, leading to a more balanced and productive work life.
FAQs
How long should I practice office yoga each day?
Aim for short sessions of 5-10 minutes, incorporating the poses gradually.
Can I practice office yoga if I have physical limitations?
Consult with a healthcare professional before starting any new exercise routine, especially if you have specific health concerns.
Do I need special equipment for office yoga?
No, most poses can be done with just a chair and a small space.
Can office yoga help with back pain caused by prolonged sitting?
Yes, many poses focus on relieving tension in the lower back and promoting better posture.
Are these poses suitable for beginners?
Absolutely! These poses are beginner-friendly and can be adapted to different fitness levels.





I loved even more than you will get done right here. The picture is nice, and your writing is stylish, but you seem to be rushing through it, and I think you should give it again soon. I’ll probably do that again and again if you protect this hike.